

This page explains what a workspace is, why you would keep brands in separate ones, and how to switch between them and create new ones.
What is a workspace?
A workspace is a self-contained home for one brand. Everything lives inside it: the connected social accounts, the brand voice, the calendar, the drafts, and the people who can see them. Each workspace keeps its own:
- Connected accounts, so a post never goes out on the wrong brand's channels.
- Brand voice, so drafts in one workspace sound like that brand and not another.
- Calendar and drafts, scoped to just that workspace.
- Members and roles, so you decide who has access to which brand.
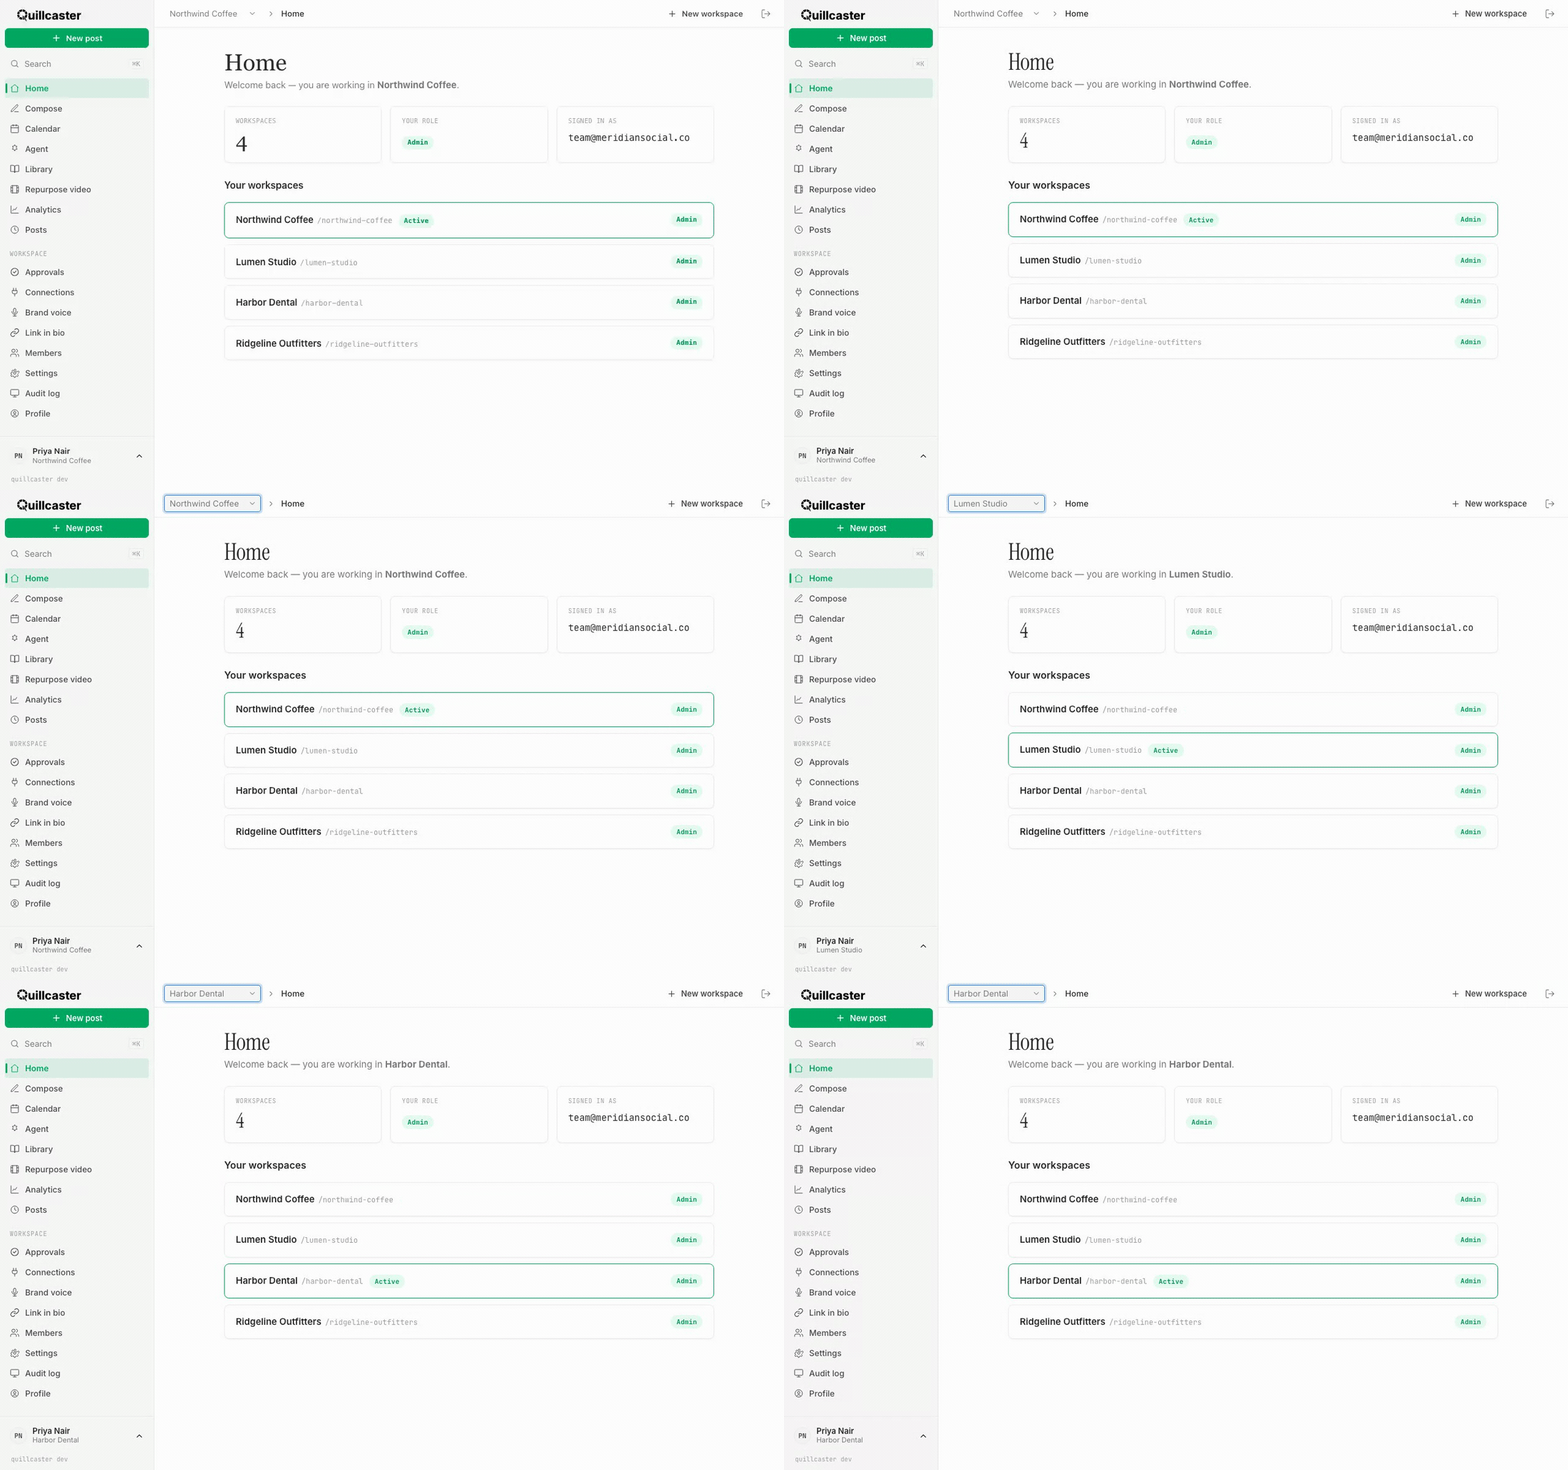
When you switch workspaces, the whole app switches with you: Compose, Connections, the calendar, and members all reflect the workspace you're in.
Why use separate workspaces?
If you run more than one brand or client, keeping each in its own workspace means nothing bleeds across. The wrong account can't be picked, one client's voice can't leak into another's drafts, and each team only sees the brand they're meant to. For an agency, the clean pattern is one workspace per client: its own accounts, its own voice, its own calendar, cleanly apart.
You can belong to as many workspaces as you're invited to, and switching between clients is just the dropdown. You can also give each client's team access to only their own workspace, and use approvals so a client signs off before anything publishes. There's more on running Quillcaster this way on our agencies page.
How to switch between workspaces
The workspace switcher is the dropdown at the top left of the app, in the breadcrumb bar. It lists every workspace you belong to.
- Open the dropdown at the top of the screen.
- Pick the workspace you want.
The app reloads that workspace's content right away, and your choice is remembered, so you land back in the same workspace next time you open Quillcaster. Your name and the current workspace also show at the bottom of the sidebar, so you can always tell where you are.
How to create a new workspace
Spinning up another brand takes a few seconds:
- Click New workspace in the top bar.
- Type a name (your brand or client name works well).
- Click Create.
The new workspace opens straight away and becomes your active one. It starts empty, so your next steps are usually to connect an account, set up a brand voice, and invite your team.
In short: one brand, one workspace. Switch with the dropdown, spin up new ones as you grow, and keep every client cleanly apart.
